Program Schedule
The Schedule defines the order of Programs to broadcast during an Event.
A Program can be from a live source, uploaded video or playout of previously recorded or uploaded video.
It’s recommended to plan the playout schedule in advance of the event and keep any changes to a minimum while the broadcast is in progress.
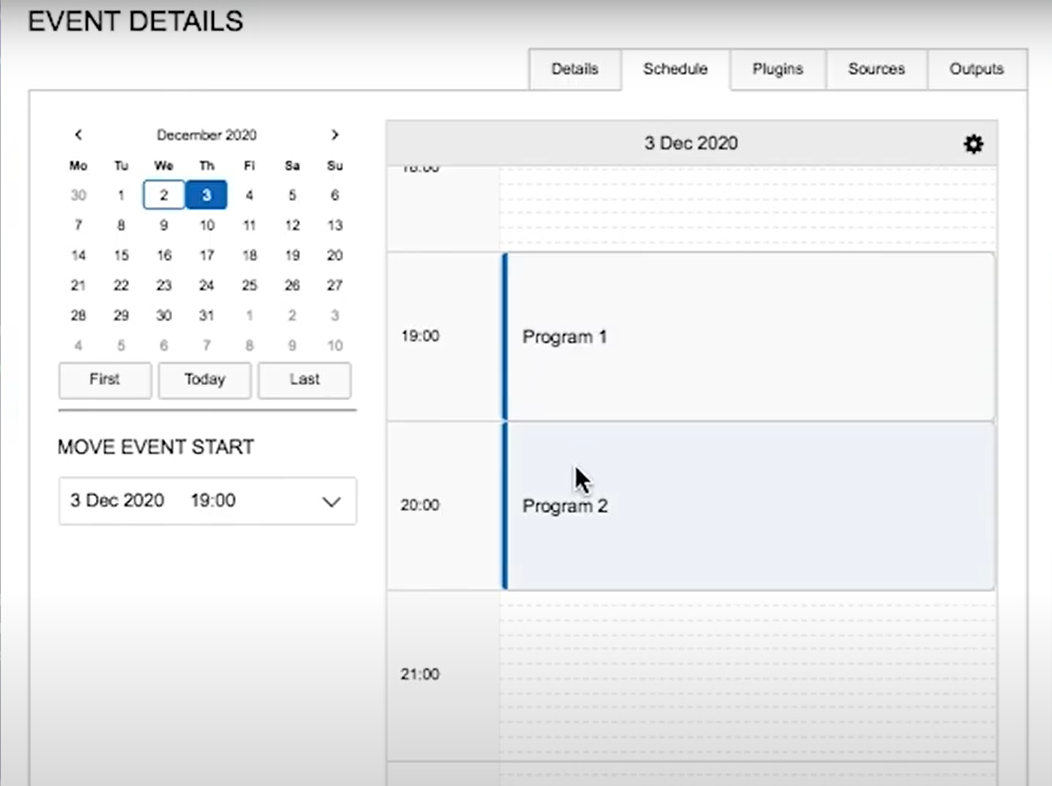
Create or Edit a Schedule
The Schedule edit view is available:
When creating a new Project or editing an Event - see Events | Create-an-Event
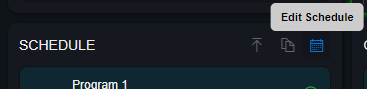
From the Control Room, press the Edit Schedule button in the Schedule panel
Tip: Press the settings cog to change zoom for the timeline
Add a Live Program
From the Edit Schedule view, click and drag in the displayed timeline to create a Program
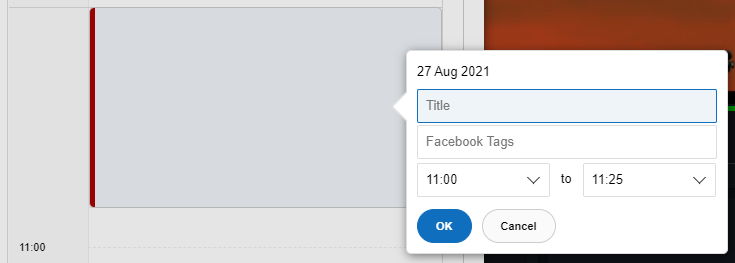
Give the Program a descriptive Title and adjust the start and end time as required
Press OK to create the Program
Save your changes
Add a Program from a new video file
Press the Schedule upload button:
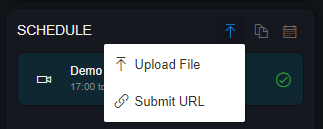
Submit the video file or URL
The Program Schedule is displayed with the submitted video added, adjust the title and timing if required
Save Changes
For more information on uploading from file or URL, see Uploading Files and Importing from URL.
Add a Program with existing video
From the Edit Schedule view, click and drag in the displayed timeline to create a Program
Type the title of one of the following in the current Project:
A previously recorded Program
A Clip - see Clips
Uploaded videos
Select from the list of matching Programs, Clips or uploaded video
Press OK to create the Program
Save your changes
Hint: Optionally search for and select a Facebook Page or User for any Program in the Schedule - the Page image will be displayed in the Sharing URL to make selection easier
Adjust the Schedule
Move start date for the Event
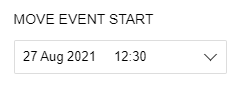
From the Edit Schedule view, select a new start date and time for the Event
Save your changes
Adjust a Program
From the Edit Schedule view, drag an existing program to a new point in the timeline
Click on the Program to change the Title, start or end times, then press OK
Save your changes
Tip: Dragging a Program to overlap another will “snap“ to before or after the overlapped program
Remove a Program from the Schedule
From the Edit Schedule view, click the Program
Press Unschedule
Save your changes
Edit Program Properties
Right click on a Program in the Schedule
Select Edit Properties
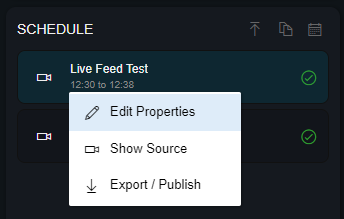
Update the properties as appropriate
Save
Adding a poster overrides the Event poster when a holding slate is broadcast during playout of the selected Program
Show Program Source
Right click on a Program in the Schedule
Select Show Source
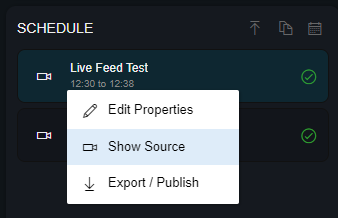
Source content is displayed in the Source section
Export a Program
Right click on a Program in the Schedule
Select Export / Publish
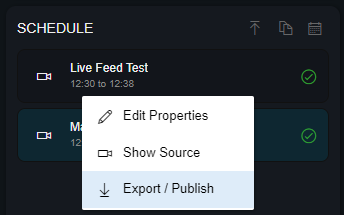
Select the desired export options
Type: Choose Source to export without any overlays, or Output to export from the rendered output
Pre Roll / Post Roll: Type the Title of a Program, Clip or uploaded video. This will render before (pre roll) or after (post roll) the selected Program
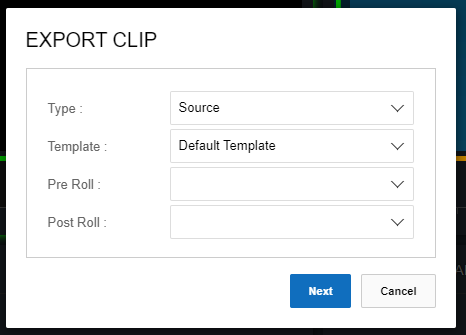
Next
Choose social accounts to publish to and/or email addresses to send a link to
Export to complete
The clip export starts and will be posted or emailed when rendering of the Clip has completed